Tuesday, 30 August 2011

Sprite Scones with Strawberries and Cream.... mmmmmm

Yes, you did read correctly, this scone recipe contains a can of Sprite which makes them very light and fluffy. Perfect for a weekend morning or an afternoon tea, and they are real easy to make, anyone can do it!

      What you need:

  • 500g self raising flour
  • 1 can sprite
  • 250ml cream
  • 1t salt 

- Pre-heat the oven to 200'C (if you have a fan oven 180'C)
- Grease a muffin pan.
- Mix all the ingredients together.
- Spoon the mixture into the muffin pan.


- Bake in the middle of the oven for  ± 20 minutes or until golden brown and when a toothpick is inserted in the center, it comes out clean.
- Allow to cool for ± 5mins, remove from pan and serve with strawberry jam and cream or preservatives of you choice. 


See you next week for a frikkie awesome chocolaty recipe.

Monday, 29 August 2011

What? a weekend

We take it you all had a frikkie awesome weekend as we did as you can see!! Keep your eye balls on the blog for some exciting developments.


Check you all soon!
Byeeeeeeeeeee!

Friday, 26 August 2011

Weekend Vibes


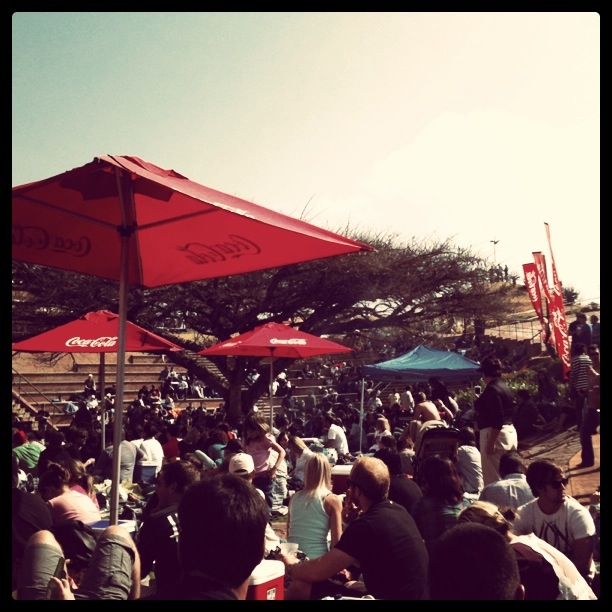
Firstly lets just say that this was a very busy week at Frikkie Awesome and we are all excited to spend the weekend chilling and doing fun summery stuff. As you can see on the images below there is some exciting stuff happening! The weather in Pretoria is going to reach a high of 28 on Saturday, definitely beer, braai and pool weather! Summer is very well on its way. Tonight will be chilled vibes, probably just quiet dinners at a cool restaurant in the 012. On Saturday you can check out the Grietfest in Joburg. On Sunday it's time for another day of chilling in the sun at Park Acoustics with Dan Patlansky, Southern Gypsey Queen, Hoot 'n Anny and Neil van Deventer. And of course baking, shopping and knitting in between!

Have a great weekend Snor-City...
Peace out P-Town !!!

Thursday, 25 August 2011

Frikkie Awesome Packaging


Now that the orders are rolling in, we thought we'd take some pics of the packing process here at Frikkie Awesome, so as to show you guys the love and care that goes into every order.


* Contact us on facebook or by email at: frikkieawesome@gmail.com *

Happy Thursday...

Wednesday, 24 August 2011

Red Velvet Brownies with White Chocolate Buttercream Frosting

Red Velvet, what is the reason behind this craze, anybody have an idea? Is it because the cake is red? Is it the buttercream frosting or the cream cheese frosting? Is it the slight hint of chocolate?

After some research on red velvet cakes I came to learn the following:

Red Velvet cake has been around for quite some time, it is said that it most likely originated in South America. The exact origin of the red velvet cake is not known. According to research it is said that the reddish-brown colour of the cake was from a reaction of the cocoa powder with an acidic ingredient such as buttermilk. Red Velvet cake is a cake with either a dark red, bright red or red-brown colour. The cake is usually prepared with a chocolate or vanilla flavour topped with a creamy white frosting, usually  either made from cream cheese or buttercream.
Common ingredients are buttermilk, butter, flour, cocoa and beetroot or red food colouring.

So now, after having some background on red velvet, lets try these brownies!

For the brownies:

2 table spoons cocoa powder
4 table spoons red food colouring
2 teaspoons pure vanilla extract
125g unsalted butter, at room temperature
1 1/2 cups sugar
2 large eggs, at room temperature
1 1/4 cups flour
1/4 teaspoon salt

For the White Chocolate Buttercream Frosting:

125g unsalted butter, at room temperature
2 1/2 cups icing sugar
1 teaspoon pure vanilla extract
100g good quality white chocolate, melted
60 ml double cream
125g cream cheese

 
To make the brownies:

- Preheat the oven to 180'C.
- Grease a 20 x 20cm baking pan
- Beat together the butter and sugar on a medium speed until light and fluffy, about 2 minutes.
- Add eggs one at a time, mixing well after each, then stir in 2 teaspoons vanilla.
- With the mixer off, add the cocoa and the food colouring, then turn the mixer to medium and mix until one   uniform colour.

 
- Slowly add in the flour and salt and mix on a medium-low speed, just until combined. Do not over mix
- Stir the batter with a rubber spatula once or twice just to ensure that all of the flour is incorporated from the sides of the bowl. You'll want one uniform coloured batter.
- Pour the batter into the prepared pan and bake for 30-35 minutes or until a toothpick comes out clean when inserted into the center of the brownies.
- Allow brownies to completely cool in the pan for about 45-60 minutes.


 -In the mean time make the frosting:
                          
- Cream butter until soft and fluffy, then beat in the vanilla.
- With the mixer on a low speed, slowly add the icing sugar 1/2 a cup at a time; allow the sugar to mix in before adding the next 1/2 cup. Once all the sugar has been added, beat on a medium speed for 30 seconds and scrape down the sides of the bowl.
- Add in the melted white chocolate and cream cheese and mix on a medium speed until incorporated.
- With the mixer on low, add the double cream 1 tablespoon at a time and beat on a medium speed until the frosting reaches your desired consistency.

**  Please note, this makes a lot of frosting, you can half the recipe.**


 - Remove the brownies from the pan onto a cutting board, cut into 12 bars, then frost and serve.

 Check back next week for another Frikkie Awesome treat!

Tuesday, 23 August 2011

Snor'tastic Spring Surprises!

See. Told you so...

Check out this sneak peak of new Frikkie Awesome snor'tastic goodies, see the accessories page for the whole range of new awesome stuff.  Get your orders in as fast as possible.

PS. Go like us on Facebook!

Monday, 15 August 2011

Perfect for today’s weather: Earl Grey Cheesecake

When I first saw this recipe a few months ago I knew I had to give it a try.  Being a tea lover I believe in the following:

If you are cold, tea will warm you. 
If you are heated, it will cool you.
If you are depressed, it will cheer you.
If you are excited, it will calm you.

This cheesecake tastes like you are having a cup of tea and eating cheesecake at the same time! Definitely one to make!

 Recipe:

1 Earl Grey tea bag
3T Hot water
1 Packet digestive biscuits (I used the choc    caramel ones)
30g Butter, Melted
750g Cream Cheese
3t Cornflour
200g Caster Sugar
3 Eggs
200ml Sour Cream


Preheat the oven to 160˚C. Open the tea bag and soak the leaves in the hot water.

Lightly grease a 25cm springform tin and line the bottom with baking paper and set aside.
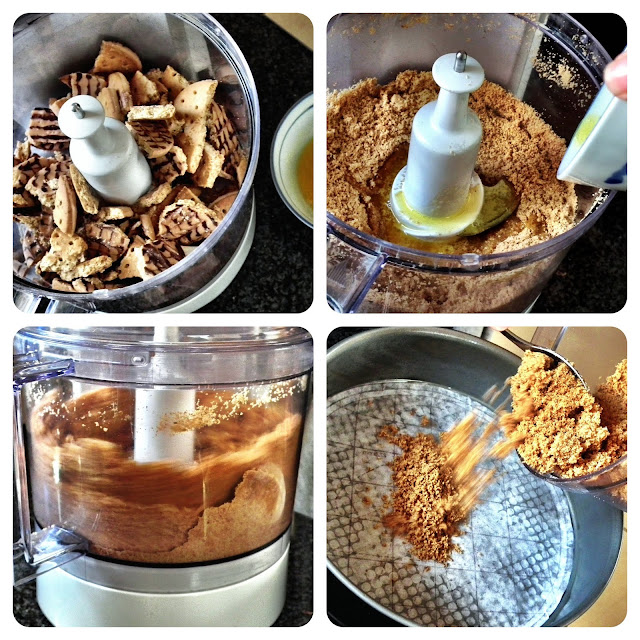
Crush the digestive biscuits until fine; add the melted butter and mix. Press the biscuit mixture into the tin.

Mix the cream cheese, cornflour and sugar together. Add the eggs, tea and sour cream and beat until the mixture thickens.

Pour into the tin and bake for 45-50 minutes until slightly wobbly in the middle.

Refrigerate until set.

This variation on a classic cheesecake is perfect for afternoon tea.


Stay tuned for next week’s treat:  Red velvet brownies.

Friday, 12 August 2011

Spring. Can you feel it. It's almost here!

So as winter winds down to it's last breathe of cold air, this can mean only one thing... Spring is on it's way!!! And of course this makes us excited!!
 With this excitement comes a whole bunch of new and exciting products from Frikkie Awesome for the coming warm weather. So keep one eye on the blog and the other on Facebook for updates concerning these new goodies!
Till then...

Wednesday, 10 August 2011

The Gautrain is Frikkie Awesome!

Okay we know the cables for the Gautrain have been stolen and it's not working 100% again, but last Friday Frikkie Awesome decided to take a trip on the Gautrain and see what it was all about and how it all worked. We decided on a trip from Hatfield to Sandton, have lunch in Sandton and then catch the train back to Hatfield. What we were curious about was did the system actually work that well... And the simple answer is YES, it works damn well! 


So for first time users, you would drive to Hatfield station and enter using one of two entrances, either in Duncan Street or by using the Park street entrance. You would have to take a parking ticket, but this will be your first and last ticket using the Gautrain, I will explain why just now. So after you have parked in one of the many parking bays available, you can proceed up to the station itself. Here we were greeted by very friendly and helpful Gautrain staff, who offered to help us purchase our Gautrain Gold Cards. Now here is where it gets super cool, the gold card you purchase is yours forever and you can just keep topping it up with cash as you need it. This card not only allows you to ride up and down on the Gautrain, but it also allows you to pay for your parking at the stations and catch the Gautrain busses to and from the stations. Pretty sweet deal if you ask me!!

 
So once you have purchased your gold card, you can proceed through the automatic gates and toward the platform. Now depending on where you are going to, you will obviously have to load enough cash onto the card so as to complete your journey. So for us we needed a minimum R86 on our cards because it was R43 to Sandton and R43 back to hatfield. Now the purpose of the Gautrain is to transport passengers to and from the destinations pretty quickly, so this means that there is a train every 20 minutes between 8:30 and 16:30 and every 12 minutes during the peak periods. So not long after arriving on the platform, our train pulled up and jumped on. We boarded and shortly after we were on our way! The ride is pretty smooth and really quiet and the seating is kinda comfy. The windows are nice and big, so you can watch the scenery fly past while the train does 160km/h!!! The train stops along the way at the various stations along the route, and it stops for about 2 minutes and then moves on, this meant that our journey from Hatfield to Sandton took us approximately 27 minutes... Not bad at all!!!

 
In all, the Gautrain is an awesome addition to our lives here in Gauteng, it's going to make it way easier to travel between P-town and Jozi and at the same time, lessen the traffic flow on the highways... So we give the Gautrain a huuuuge thumbs up and definitely recommend everyone  give it a try, because it's Frikkie Awesome!!!

Peace out. P-town!

Wednesday, 3 August 2011

So... Frikkie Awesome spent the day photographing some of the knitwear...Go check them out under the KNITWEAR tab.

Let us know what you think. Prices have been included for your convenience.


Tuesday, 2 August 2011

Check out the ACCESSORIES tab


Check out the ACCESSORIES tab to see some Awesome Pendants. Let us know what you think and contact us if you are interested in owning your own Frikkie Awesome Pendant.


More exciting products coming soon!


Frikkie Awesome Blog up and running

Hi and welcome to the Frikkie Awesome blog!! This blog is for the not so 'mainstream' resident of Pretoria, but rather for the vibey Snor City local! Frikkie Awesome will be updated as often as possible so as to keep those in the know up to speed with the coolest local happenings and hangouts plus the trendiest fashion accessories this side of the Jukskei!!

Peace Out. P-Town.